

LiftMaster keypads offer secure garage access‚ but proper programming is crucial․ This manual guides users through compatibility checks‚ programming steps‚ and troubleshooting for various models․
Understanding Keypad Models
LiftMaster offers diverse keypad models‚ evolving over time․ Older versions like the 973s and 971s differ significantly from newer MAX keypads‚ such as the 877LM and 387LM/387LMC․ Programming procedures vary between these generations; the 877LM requires a simple learn button press‚ while MAX keypads involve a more complex sequence․
Compatibility hinges on the garage door opener’s manufacturing date – post-1993 openers are generally supported․ Identifying your specific keypad model is the first step towards successful programming and troubleshooting‚ ensuring seamless garage access․
Importance of the Manual
A LiftMaster keypad instruction manual is essential for correct installation and operation․ Incorrect programming can lead to security vulnerabilities or a non-functional system․ The manual details specific procedures for each model‚ ensuring compatibility with your garage door opener․
It also provides troubleshooting steps for common issues‚ potentially saving costly service calls․ Understanding the learn button functionality and memory limitations‚ as outlined in the manual‚ is vital for maintaining a secure and reliable garage access system․

Keypad Compatibility
LiftMaster keypads work with specific openers manufactured after 1993․ Confirming compatibility—models like 877LM‚ 387LM‚ and older versions—is crucial for successful programming․
Compatible LiftMaster Garage Door Openers
LiftMaster keypads demonstrate compatibility with a range of residential garage door openers․ Ensuring your opener is on the compatible list is the first step․ These keypads generally function seamlessly with LiftMaster‚ Chamberlain‚ and Craftsman openers manufactured after January 1‚ 1993․ However‚ specific models like the 877LM and 387LM have broader compatibility․ Always verify your opener’s manufacturing date and model number before attempting programming․ Compatibility issues often stem from using a keypad with an older‚ unsupported opener system‚ hindering successful operation․
Keypad Models: 877LM‚ 387LM‚ and Older Versions (973s‚ 971s)
LiftMaster offers various keypad models‚ each with unique programming procedures․ The 877LM is a popular‚ newer option requiring a simple “learn” button press and code entry․ The 387LM/387LMC requires an initial compatibility check and activating learn mode․ Older models like the 973s and 971s often necessitate resetting the opener’s memory due to code limitations․ Understanding your specific model is vital for successful programming and avoiding common troubleshooting issues․ Newer MAX keypads differ significantly from these older versions․
Checking Manufacturing Date (Post-1993 Requirement)
Successful LiftMaster keypad programming hinges on your garage door opener’s manufacturing date․ Keypads are generally incompatible with openers produced before January 1‚ 1993․ This limitation stems from changes in receiver technology․ While determining the exact date can be tricky‚ look for a sticker on the opener unit itself․ If the date is unavailable‚ assume incompatibility and consider upgrading your opener for modern keypad functionality․ Confirming this detail prevents frustrating programming attempts․
Programming a LiftMaster Keypad – General Steps
Before coding‚ ensure the garage door opener’s light functions correctly‚ as it serves as a programming indicator․ Locate and prepare to use the “Learn” button․
Confirming Garage Door Opener Light Functionality
Crucially‚ a working garage door opener light is essential for successful keypad programming․ The light flashes during the learning process‚ visually confirming the opener is in programming mode and accepting the new code․ If the bulb is burnt out or the light isn’t functioning‚ you won’t be able to effectively pair the keypad․
Test the light by simply activating the garage door opener with a remote or the wall button․ If it doesn’t illuminate‚ replace the bulb or address any electrical issues before proceeding․ A functioning light is a key indicator that the opener is ready to learn the keypad’s code․
Locating the “Learn” Button on the Garage Door Opener
Identifying the “Learn” button is vital for programming․ Typically‚ it’s a small‚ square button – often purple or green – located on the back of the garage door opener motor unit․ On some 8500 models‚ it resides under the gray wall button․ This button initiates the learning process‚ allowing the opener to recognize the keypad’s unique code․
Consult your garage door opener’s manual if you have trouble locating it․ Pressing this button puts the opener into a temporary mode‚ ready to accept new remote or keypad codes․

Programming the 877LM Keypad
For the 877LM‚ press the “Learn” button twice‚ enter your desired code on the keypad‚ and then hold the “Enter” button for 3-5 seconds․
Pressing the Learn Button Twice
Initiating the programming sequence for the 877LM keypad requires a specific action on the garage door opener unit․ Locate the “Learn” button‚ typically a small‚ square button often colored purple or green‚ on the back of the opener․ A crucial step is to press this button twice in quick succession․ This double-press action signals to the opener that you are preparing to add a new device – in this case‚ your LiftMaster keypad – to its memory․
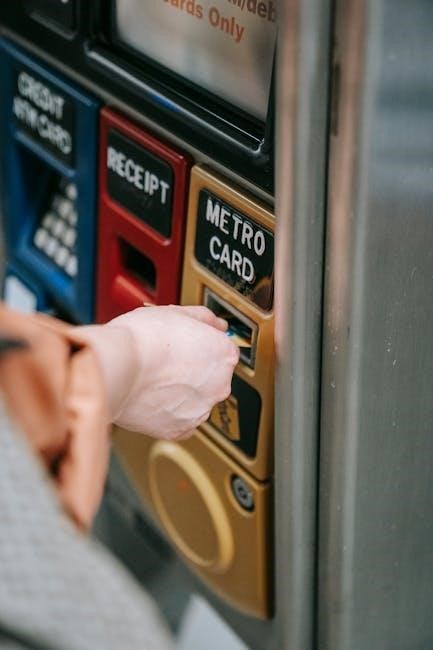
Entering the Desired Code on the Keypad
Following the double-press of the “Learn” button‚ promptly return to your LiftMaster 877LM keypad․ Now‚ carefully input the four-digit personal code you wish to use for accessing your garage door․ Choose a code that is easy for you to remember‚ but difficult for others to guess․ Avoid obvious sequences like “1234” or your birthdate․ This code will be your primary means of controlling the garage door via the keypad․
Holding the “Enter” Button for 3-5 Seconds
After successfully entering your chosen four-digit code on the 877LM keypad‚ the final step in programming is to press and hold the “Enter” button․ Maintain pressure on this button for a duration of three to five seconds․ During this time‚ the garage door opener’s light should flash‚ confirming successful code registration․ Release the button once the light indication is observed‚ signifying the keypad is now programmed․
Programming the 387LM/387LMC Keypad
These keypads require a compatibility check‚ ensuring your opener was manufactured after 1993 and has a functioning light for programming indication․
Initial Compatibility Check
Before attempting to program your 387LM or 387LMC keypad‚ verify compatibility with your LiftMaster garage door opener․ Ensure the opener was manufactured after January 1‚ 1993‚ as older models may not be supported․ Confirm your garage door opener is from a compatible brand․
Critically‚ the garage door opener must have a working light; this light serves as a vital programming indicator during the keypad setup process․ Without a functioning light‚ successful programming will be impossible․ Double-check these prerequisites before proceeding to avoid frustration․
Entering a 4-Digit Code
For the 387LM/387LMC keypad‚ after activating Learn mode‚ you’ll input a personalized 4-digit code․ This code will be your primary means of accessing the garage door․ Choose a code that is easy for you to remember‚ but difficult for others to guess․
Carefully enter the four digits on the keypad‚ followed by pressing the “Enter” button just once․ Then‚ immediately press the number “0”․ This sequence signals the keypad is ready to link with the garage door opener․
Activating Learn Mode on the Opener
To initiate the pairing process‚ locate the “Learn” button on your LiftMaster garage door opener․ This button is typically square and colored purple or green․ Press this button twice in quick succession․ This action puts the opener into “Learn” mode‚ indicated by an illuminated light․
You now have a limited timeframe – usually 30 seconds – to complete the keypad programming․ Proceed promptly to the keypad to enter your desired access code and finalize the connection․

Resetting the Garage Door Opener Memory
Clearing the opener’s memory resolves programming conflicts and prepares it for new devices․ Locate the purple/green “Learn” button and hold it for 10-15 seconds․
Locating the Purple/Green “Learn” Button on the Opener Unit
The “Learn” button is essential for programming keypads and remotes․ It’s typically a small‚ square button‚ often colored purple or green‚ found on the back of the garage door opener motor unit․ Its exact location can vary slightly depending on the model‚ but it’s usually near the antenna wire․
Look carefully; it might be recessed․ This button initiates the learning process‚ allowing the opener to recognize new devices․ Pressing and holding this button puts the opener into a temporary programming mode‚ ready to accept codes from your keypad or remote․
Holding the Button for 10-15 Seconds
To effectively reset the garage door opener’s memory‚ press and hold the purple or green “Learn” button for a duration of 10 to 15 seconds․ This extended press initiates a complete memory wipe‚ clearing all previously programmed remote and keypad codes․
During this process‚ observe the opener’s light indicator; it will likely flash or change state to signal the memory clearing is in progress․ This reset prepares the system for fresh programming‚ resolving potential conflicts or forgotten codes․
Observing the Light Indicator
The garage door opener’s light is a vital programming indicator․ During a memory reset‚ watch for the light to flash or change‚ confirming the process is underway․ After resetting‚ the light will activate when the “Learn” button is pressed‚ signaling the system is ready to accept new codes․
A solid light often indicates successful programming‚ while a blinking light may signify an issue or the need for further steps․ Pay close attention to the light’s behavior throughout the process․

Troubleshooting Common Keypad Issues
Common problems include a non-responsive keypad‚ incorrect codes‚ or a full memory․ Resetting the opener or checking battery levels often resolves these issues quickly․
Keypad Not Responding
If your LiftMaster keypad isn’t responding‚ begin by ensuring fresh batteries are installed․ A low battery is a frequent cause․ Next‚ verify the keypad is within range of the garage door opener․ Interference from other devices can also be a factor․
Try resetting the opener’s memory by holding the “Learn” button for 10-15 seconds‚ then reprogram the keypad․ If the issue persists‚ consult a local garage door professional for assistance‚ as there might be an internal component failure․
Code Not Working After Programming
If your newly programmed code isn’t functioning‚ double-check the entered digits for accuracy․ Ensure you held the “Enter” button for the required 3-5 seconds during programming․ The garage door opener may have reached its memory limit‚ forgetting older codes as new ones are added․
Resetting the opener’s memory and reprogramming all codes can resolve this․ If problems continue‚ verify compatibility with your opener model and consider contacting LiftMaster support․
Memory Limit Reached – Older Codes Forgotten
LiftMaster garage door openers have a limited memory capacity for remotes and keypads․ Over time‚ as you add new devices‚ the system may begin to forget the oldest programmed codes to accommodate the new ones․ This is a common occurrence‚ especially with frequent additions or changes․
Resetting the opener’s memory clears all existing codes‚ allowing you to start fresh and reprogram all your devices․ This ensures optimal functionality and avoids access issues․
Remote Compatibility and Programming
After resetting the garage door opener’s memory‚ reprogramming remotes is essential for continued operation․ Existing remotes can often be utilized in the programming process․
Programming Remotes After Resetting Memory
Following a memory reset on your LiftMaster garage door opener‚ reprogramming your remotes is a straightforward process․ Begin by locating the “learn” button on the opener unit – typically a purple or green square․ Press this button twice‚ initiating learn mode․ Then‚ within the allotted time‚ press the button on your remote until the garage door opener light flashes‚ confirming successful programming․ Repeat this process for each additional remote you wish to connect to the system‚ ensuring each remote functions correctly after pairing․
Using Existing Remotes for Programming
Leveraging existing‚ programmed remotes can simplify the process of adding new ones to your LiftMaster system․ After resetting the opener’s memory‚ initiate learn mode by pressing the “learn” button twice․ Then‚ simultaneously press and hold the buttons on a working remote until the garage door opener light blinks․ This links the new remote to the existing system‚ streamlining the setup and eliminating the need to reprogram each remote individually․

Finding Replacement Keypads and Remotes
Local garage door companies often stock older‚ discontinued models or have spare remotes available for purchase at a reduced cost․ Explore these options!
Contacting Local Garage Door Companies
Reach out to local garage door service providers; they frequently accumulate a surplus of older remotes and keypads from installations․ These companies may be willing to sell these parts at a significantly lower price than retail․ Don’t hesitate to call around and inquire about their inventory of discontinued or used LiftMaster components․ Often‚ they have items they’re happy to part with for a nominal fee‚ like $10‚ rather than letting them sit unused․ This can be a cost-effective solution for finding a compatible replacement․
Sourcing Older‚ Discontinued Models
Finding older‚ discontinued LiftMaster keypads can prove challenging‚ but isn’t impossible․ Online auction sites and marketplaces are potential sources‚ though verifying compatibility is vital․ Local garage door companies‚ as mentioned previously‚ often retain older stock․ Be prepared to thoroughly research the model number and manufacturing date to ensure it aligns with your garage door opener’s requirements․ Patience and diligent searching are key when pursuing these harder-to-find components․

Safety Precautions
Always test keypad functionality post-programming to confirm safe operation․ Regularly verify the system works correctly‚ ensuring the garage door responds as expected․
Ensuring Proper Functionality After Programming
After successfully programming your LiftMaster keypad‚ thoroughly test its operation from various distances․ Verify the garage door opens and closes completely with each code entered․ Confirm the keypad responds consistently‚ even after multiple attempts․ Observe the garage door’s movement for any obstructions or unusual sounds during operation․
If issues arise‚ double-check the programming steps and ensure compatibility with your opener․ A malfunctioning keypad can compromise security‚ so address any concerns promptly․ Prioritize safety by regularly testing and maintaining the system․
Regularly Testing the Keypad
Consistent testing of your LiftMaster keypad is vital for maintaining security and convenience․ Implement a routine – weekly or monthly – to verify functionality․ Enter your code and observe the garage door’s response‚ ensuring smooth operation․ Check for any delays or unresponsive behavior․
Battery-powered keypads should be monitored for low battery indicators․ Proactive testing identifies potential issues before they become critical‚ preventing access problems and ensuring reliable performance․ Don’t neglect this simple‚ yet crucial‚ maintenance step․

Advanced Settings (If Applicable)
Some LiftMaster keypads allow volume and backlight adjustments for personalized use․ Consult your specific model’s manual to explore these optional configuration features․
Adjusting Keypad Volume
Certain LiftMaster keypad models feature adjustable volume settings‚ allowing users to control the audible feedback during code entry and confirmation․ Typically‚ volume adjustment involves pressing and holding specific button combinations on the keypad itself․ Refer to your specific model’s instruction manual for the precise sequence‚ as it varies․
The goal is to find a volume level that provides sufficient auditory confirmation without being disruptive to household members or neighbors․ Experiment with different settings to determine the optimal volume for your environment and personal preference․ Remember to test the volume after each adjustment․
Changing the Backlight Settings
Many LiftMaster keypads include a backlight feature to enhance visibility in low-light conditions․ Adjusting the backlight settings often involves accessing a specific menu or pressing a dedicated button sequence on the keypad․ Consult your model’s manual for detailed instructions‚ as procedures differ․
Options may include turning the backlight on or off‚ adjusting its brightness level‚ or setting an auto-dimming timer․ Optimizing the backlight ensures clear visibility without excessive energy consumption․ Regularly check the battery if the backlight seems dim․
Understanding the Learn Button Indicator Light
The garage door opener’s “Learn” button light provides crucial feedback during programming․ A solid or blinking light signals different stages of the learning process․
Solid Light
A solid light on the “Learn” button typically indicates that the garage door opener is actively in learn mode‚ ready to accept a new device’s signal․ This means the opener’s memory is open and awaiting a code from a remote or keypad․ Ensure the keypad code is entered promptly while the light remains solid‚ as it won’t stay in this state indefinitely․ If the light isn’t solid when attempting to program‚ double-check that the “Learn” button was pressed the correct number of times to initiate the process․
Blinking Light
A blinking light on the garage door opener’s “Learn” button signifies different states depending on the timing․ After pressing the button‚ a blinking light confirms the opener is searching for a signal․ If the light blinks rapidly after entering a code‚ it suggests the signal wasn’t received or the memory is full․ Holding the learn button until the light stops blinking prepares the system for remote or keypad programming‚ as described in specific model instructions․

Keypad Power and Battery Information
Keypads rely on batteries for operation; regular replacement is essential․ Low battery indicators signal the need for a change to maintain consistent functionality and security․
Battery Replacement
Replacing the battery in your LiftMaster keypad is a straightforward process․ Typically‚ the battery compartment is located on the back of the unit‚ often secured with a small screw or latch․ Use fresh alkaline batteries of the correct size‚ as specified in your keypad’s manual․ Ensure proper polarity when inserting the new batteries – incorrect installation can prevent operation․ After replacement‚ re-enter your code to confirm functionality and ensure the keypad is properly communicating with the garage door opener․
Low Battery Indicators
LiftMaster keypads often provide visual cues when the battery is running low․ This commonly manifests as a blinking light or a diminished backlight brightness․ Some models may also display an error message on the keypad screen․ Recognizing these indicators promptly allows for timely battery replacement‚ preventing unexpected keypad failure and ensuring continued secure access to your garage․ Don’t ignore these warnings; replace the battery immediately!
Resources and Support
For further assistance‚ visit the official LiftMaster website or contact their customer support team․ Local garage door companies can also provide expert help․
LiftMaster Official Website
The LiftMaster official website is a comprehensive resource for all your keypad and garage door opener needs․ You’ll find detailed support documentation‚ including frequently asked questions‚ troubleshooting guides‚ and downloadable instruction manuals for a wide range of models‚ like the 877LM and 387LM․
Furthermore‚ the website offers model-specific videos demonstrating programming procedures and provides access to replacement parts ordering․ It’s the primary source for the latest information and updates regarding LiftMaster products and services‚ ensuring you have the tools to maintain optimal functionality․
Customer Support Contact Information
For personalized assistance with your LiftMaster keypad‚ direct customer support is readily available․ You can reach LiftMaster’s support team via phone at 1-800-344-4044․ Alternatively‚ explore the online support portal on their official website for live chat options and email submission forms․
Local garage door companies are also valuable resources‚ often possessing expertise and potentially offering used remotes at a low cost․ Don’t hesitate to contact them for troubleshooting or replacement options․